How to Install Parking Guides in Your Home Garage

To install parking guides in your home garage, start by evaluating your space and choosing the right guide type for your needs. Gather necessary tools and prepare the area by cleaning and marking ideal placements. For floor-based guides, secure them at the desired stopping point. If using laser or sensor systems, mount them on the ceiling or walls, ensuring proper alignment with your vehicle. Test the guides by slowly parking your car and make adjustments as needed. Regular maintenance, including cleaning and checking for wear, will keep your guides functioning at their best. With these steps, you'll be on your way to stress-free parking in no time.
Assess Your Garage Space
Evaluating your garage space is the essential first step in installing effective parking guides. To begin, measure the dimensions of your garage, including length, width, and height. This information will help you determine the appropriate size and placement of parking guides for your home garage.
Next, assess the layout of your garage space. Take note of any obstacles, such as support beams, shelving units, or stored items that may affect the positioning of your parking guides. Consider the size and turning radius of your vehicles to ensure the parking space can accommodate them comfortably.
Examine the available wall and ceiling space in your garage. This will help you identify the best mounting options for your parking guides. Some guides may require wall attachment, while others can be suspended from the ceiling.
Lastly, evaluate the lighting conditions in your garage. Proper visibility is imperative for effective parking guide usage. If your garage has poor lighting, consider installing guides with reflective materials or LED indicators to enhance visibility.
Choose the Right Parking Guide
With your garage space assessed, it's time to select the most suitable parking guide for your needs. Consider various options like laser guides, sensor-based systems, physical barriers, and multi-modal solutions. Evaluate each option based on your garage layout, vehicle size, and personal preferences.
When choosing a parking guide, factor in installation complexity, power requirements, and customization options. For instance, the Maxsa Park Right Parking system offers adjustable garage parking aids that can be customized to your specific needs. Alternatively, a Park Right Parking Mat provides a simple, physical solution without power requirements.
Consider these key factors when selecting your parking guide:
- Range and accuracy of the system
- Visibility in different lighting conditions
- Compatibility with your vehicle type
- Integration with existing garage setup
Opt for solutions that provide both visual and auditory feedback, such as a laser beam guide combined with a parking sensor. This multi-modal approach improves parking precision and helps prevent collisions. Remember to evaluate the technology's range and accuracy to align it with your garage dimensions and parking habits. By carefully considering these factors, you'll select a parking guide that enhances your parking experience and protects your vehicle.
Gather Necessary Tools and Materials

Preparation is key when installing parking guides in your home garage. Before you begin, gather all the necessary tools and materials to guarantee a smooth installation process. You'll need a drill with compatible bits for both drilling and driving screws. Don't forget to have the right fasteners and anchors on hand to firmly mount your parking guide components.
Accurate measurements are indispensable, so equip yourself with a measuring tape, level, and pencil to mark installation points precisely. Depending on your chosen parking guide system, you may need double-sided tape or adhesive for mounting sensors or indicators. If your system requires power, make sure you have the appropriate electrical supplies, such as extension cords or battery packs.
Safety should be your top priority, so grab a sturdy ladder to reach higher installation points safely. Remember to check if your parking guide manufacturer specifies any additional hardware or mounting materials. By having all these tools and materials ready, you'll be well-prepared to tackle the installation process efficiently and effectively, guaranteeing your new parking guides are securely and accurately installed in your home garage.
Prepare the Installation Area
The installation area's preparation is essential for successful parking guide placement. Before you begin, clear out your home garage, making sure you have ample space to work. Move any obstacles that might interfere with the installation process or your ability to maneuver freely. Next, clean the garage floor thoroughly, removing dirt, oil stains, or debris that could affect the adhesive's effectiveness.
Determine the ideal location for your parking guides based on your vehicle's dimensions and the distance from the wall you prefer. Mark these spots clearly using painter's tape or chalk. This step is pivotal for Easy to install DIY home projects like this one.
Consider the following when preparing your installation area:
- Lighting: Guarantee adequate illumination to see markings and work precisely.
- Temperature: Check that the garage environment isn't too cold or hot for proper adhesive bonding.
- Surface condition: Inspect the garage floor for any damage that might need repair before installation.
- Safety: Remove any tripping hazards and wear appropriate protective gear.
Mark Placement for Guides

Now that you've readied the installation area, it's time to mark the precise placement for your parking guides. Begin by measuring the depth and width of your garage to determine the ideal positioning for your parking aids. Consider your vehicle's dimensions and clearance requirements to make sure you'll have enough space to park comfortably.
Next, identify the spot where your car's front tires should stop when fully parked. This is vital for achieving the right placement of your guides. Use painter's tape or chalk to outline the designated parking area on the floor, creating a visual reference for guide installation.
For added precision, consider installing a laser guide on your garage ceiling. This will project a beam onto your vehicle's dashboard, helping you park in the exact right spot every time. If opting for wall-mounted guides, mark their positions on both sides of your parking space.
Don't forget to identify suitable locations for any additional sensors or visual aids you plan to install. These might include proximity sensors or LED indicators to further assist your parking efforts at home.
Install Wall-Mounted Parking Aids
Ready to install your wall-mounted parking aids? With basic tools and a bit of planning, you'll have precise vehicle positioning in no time. Start by choosing the ideal location on your garage walls, considering the stopping point of your vehicle and the best reference point for visibility. Use reflective tape to mark the spot temporarily before drilling.
Next, follow these steps to install your parking aids:
- Measure and mark the mounting height on the wall, ensuring it aligns with your vehicle's sensors or driver's line of sight.
- Drill holes and insert anchors for secure attachment.
- Attach the device to the wall, ensuring it's level and properly aligned.
- Connect the parking aid to a power source, either a nearby outlet or batteries.
Proper alignment is essential for accurate distance measurements. Some devices offer adjustable positioning, allowing you to fine-tune the angle for optimal performance. If your garage door opens near the installation area, make sure the parking aid doesn't interfere with its movement.
Once installed, test the device by parking your vehicle and adjusting as needed. You may need to relocate the aid slightly to achieve the perfect balance between guidance and space efficiency. With your new wall-mounted parking aids in place, you'll park with confidence every time.
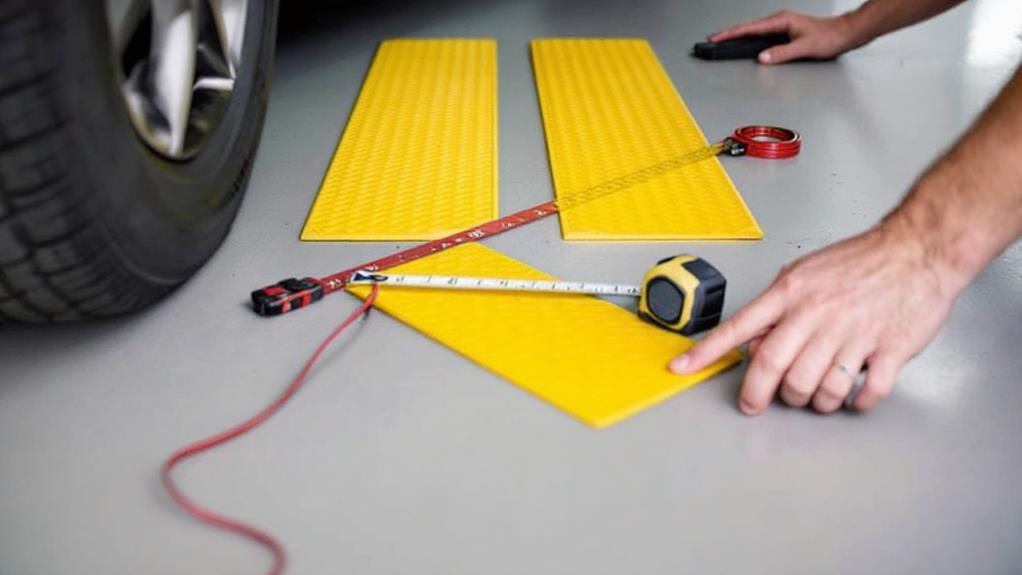
Set Up Floor-Based Parking Guides

Setting up floor-based parking guides offers a simple yet effective way to safeguard precise vehicle positioning in your garage. To begin, choose between a parking mat or wheel stop curb as your preferred floor guide. These aids serve as both visual and physical guides, helping you park accurately every time.
Measure your vehicle's length to determine the ideal placement for your parking guide. Once you've decided on the position, secure the parking mat or curb to the garage floor using screws, adhesive, or other mounting methods. This will prevent the guide from shifting during use, maintaining consistent parking results.
For enhanced visibility, especially in low-light conditions, opt for parking guides with reflective or high-contrast colors. This feature will make it easier to see the guides as you're pulling into your garage. Don't forget to consider your vehicle's dimensions and weight when selecting a parking guide to guarantee compatibility and prevent potential damage.
Some parking mats double as drip trays, catching any fluids that might leak from your vehicle. This added functionality can help keep your garage floor clean and protected. By following these steps, you'll create a reliable system for parking your vehicle precisely every time you enter your garage.
Configure Laser or Sensor Systems
Numerous homeowners are turning to laser or sensor systems for precise parking guidance in their garages. These advanced technologies offer unparalleled accuracy for side-to-side parking in tight garage spaces. To configure a laser or sensor system, you'll need to thoughtfully consider placement and alignment.
If you're opting for a laser-based system, install the dual laser unit on your garage ceiling. Adjust the lasers to indicate the ideal stopping point and lateral position for your vehicle. For sensor-based systems, mount ultrasonic or infrared sensors strategically to detect your car's proximity as you approach the parking spot.
When setting up your precision parking system, keep these key points in mind:
- Guarantee proper alignment to accommodate your vehicle's size and driver-side position
- Customize sensor systems for optimal performance in your specific garage layout
- Ponder integrating floor markings with your laser or sensor system for comprehensive guidance
- Frequently check and adjust your system to maintain accuracy
Both laser and sensor systems offer advantages for tight garage spaces. Laser aids typically provide more adjustability, while sensor systems offer real-time proximity alerts. By carefully configuring your chosen system, you'll achieve the precision parking you need for your home garage.
Test and Adjust Placement
Once you've installed your parking guides or configured your laser or sensor system, it's time to put them to the test. Start by slowly driving your vehicle into the garage, paying close attention to how the parking aids interact with your car. As you approach your designated parking spot, note whether the guides are positioned exactly where you need them to be effective.
After your initial test, you may need to adjust the placement of your parking aids. If you're using physical guides, move them slightly if they're not close enough to your vehicle or if they're in the way. For laser or sensor systems, recalibrate the positioning to guarantee they activate at the right moment. Remember, the goal is to have guides that assist you without causing any obstructions.
Repeat the testing process several times, making small adjustments after each attempt. Pay attention to how easily you can maneuver your vehicle and whether you're consistently parking in the ideal position. Don't hesitate to fine-tune the placement of your aids until you're completely satisfied with their performance. With patience and careful adjustment, you'll soon have a reliable system that makes parking in your home garage effortless and precise.
Maintain Your Parking Guides
Proper maintenance of your parking guides is essential for guaranteeing their longevity and effectiveness. Regularly check for signs of wear or damage, and replace them if necessary to maintain accurate guidance. Clean the guides periodically to remove dirt and debris that could interfere with their operation. This helps prevent issues and ensures your parking guides function correctly every time you park.
Inspect the mounting hardware and make sure the guides are securely in place. Tighten or adjust as needed to keep them stable. Test your parking guides regularly to verify they're providing the expected feedback, just like a stop sign helps you know when to stop. Follow the manufacturer's recommended maintenance instructions to keep your guides in ideal condition and extend their lifespan.
To maintain a proper garage with effective parking guides:
- Establish a routine maintenance schedule
- Keep spare parts or replacement guides on hand
- Document any issues or adjustments made
- Consider upgrading to more durable materials if frequent replacements are necessary
Related posts